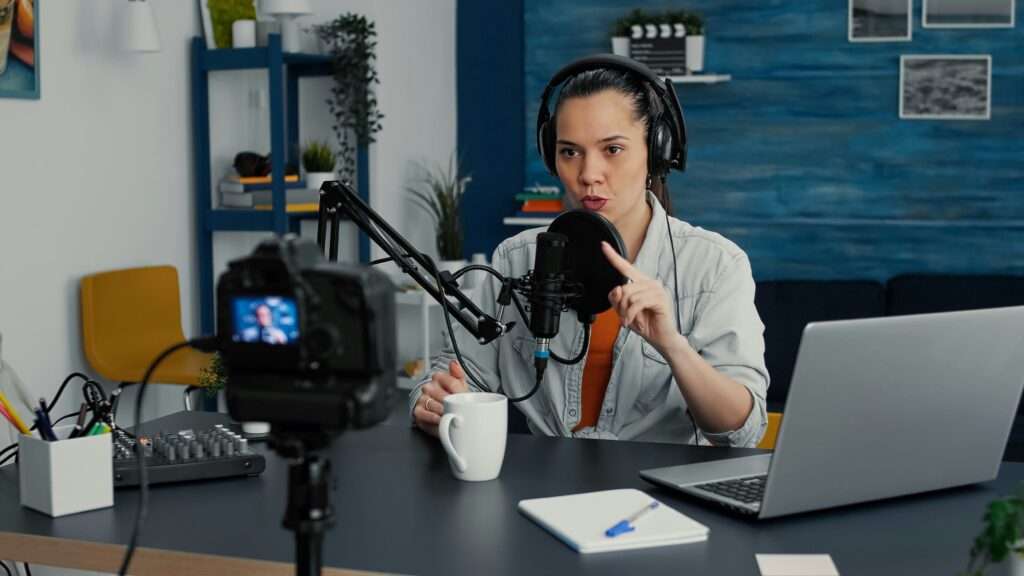
There is no substitute for the intimacy of recording in-person without a flaky Internet connection involved.
Tyler Cowen, my favorite interview podcaster, only records his show in-person. But Terry Gross, the renowned Fresh Air interviewer, loves recording remotely — she once told Jimmy Fallon that it allows her to read her notes without her guest thinking that she isn’t paying attention to what they are saying.
If remote recording fits your style, Zoom.us is a good tool to master. Zoom Video Communications makes video chat software similar to Skype & Google Hangouts Meet. At Resonate, we are seeing more and more customers doing remote recordings for their podcast on a Zoom Call. The Zoom team is actively courting podcasters; last year the company published a list of successful podcasts using Zoom.
This article will introduce you to the Zoom recording features. Follow along and, by the end, you will have recorded your first test podcast episode using Zoom.
Is Zoom Free?
Yes, Zoom has a free tier that allows you to host up to 100 participants with unlimited 1 to 1 meetings. Meetings with three or more participants are limited to 40 minutes, so podcasts with multiple guests will need to bump to the Pro plan that caps meetings at 24 hours. At $14.99 per month per host, the Zoom Pro plan also gives you access to the Cloud Recording feature for managing recordings on zoom.us.
Equipment Checklist
Preparation is critical for capturing the best possible audio quality, free from technical glitches and distractions. Zoom fans claim that it stutters less than Skype and other alternatives, but it doesn’t matter how well the Zoom app works if your Internet connection is bad or your microphone is configured incorrectly. Here is our essential equipment checklist for using Zoom:
✅ Microphone
We’ve written extensively on how to choose and configure your microphone. Take your time selecting and setting up the right mic for you.
✅ Computer or Phone
Everyday we see podcasters recording on laptops that are out-dated and maxed out on memory or disk space. Running on the latest equipment is ideal, but we know how expensive new MacBooks are, so it’s critical that you always shut down everything except for Zoom when you are recording your podcast — especially Google Chrome; all those browser tabs you are hoarding (no judgement here, I do it too) are taking up tons of memory that Zoom could use for recording your call.
✅ Headphones
A great pair of headphones will enhance the conversation, and allow you to monitor your audio while recording your podcast. Using headphones is mandatory for remote recording. Check out our post on the best studio headphones for some recommendations.
✅ Camera
Zoom’s HD video support really improves the quality of a remote recording and your laptop’s built-in camera is OK, but we recommend the Logitech C920S HD Pro Webcam running the Logitech Camera Settings app for fine-tuning your camera settings to look your best.
✅ Internet Connection
Zoom lists the minimum bandwidth requirement as 3 Mbps (upload & download) for HD group video conferencing. You can verify that your Internet connection is fast enough by running a Speed Test at speedtest.net. If your speed test does not meet or exceed the speeds you are paying for from your Internet service provider, definitely contact their support and ask for a tech to come out and troubleshoot your network. We highly recommend you and your guest both use a wired Internet connection to eliminate any problems with your local wireless network.
With your podcast recording equipment in order, it’s time to install and configure Zoom.
Installing Zoom
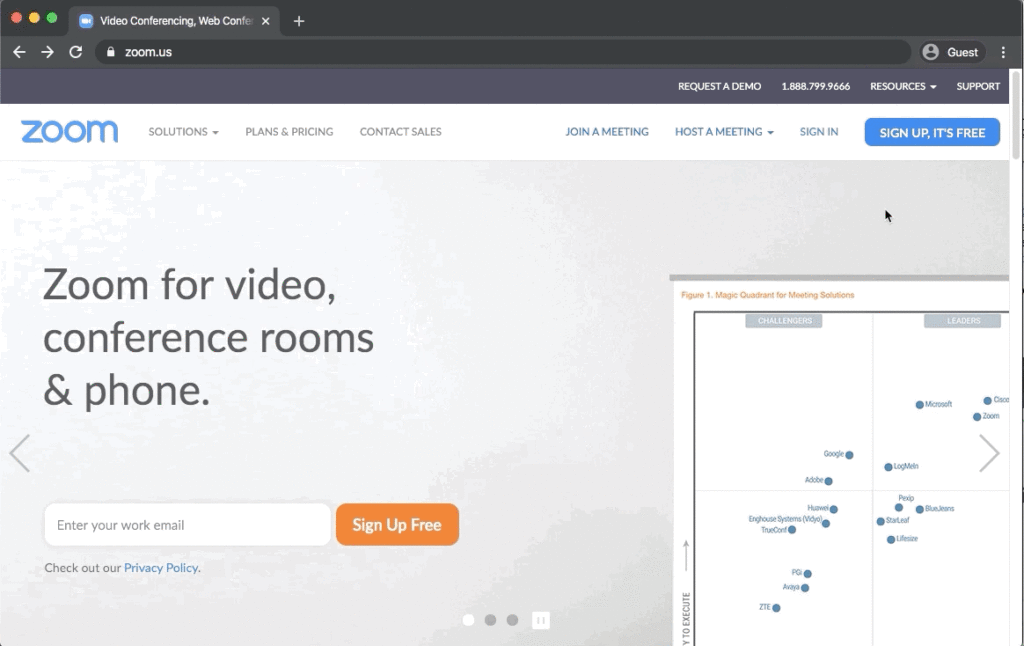
Zoom has several different apps available in their Download Center, but to get started you just need the Zoom Client for Meetings.
- Visit zoom.us
- Tap Resources in the top right corner
- Click Download Zoom ClientClick the Download button under Zoom Client for Meetings — it should be at the top of the download listing
- Follow the instructions to finish installing the Zoom client.
All set! You should see a new app named Zoom in your Applications listing. If it didn’t already start up automatically, fire it up and move on to the next step — creating a Zoom account.
Creating a Zoom Account
Participants can join Zoom Meetings without an account, but if you plan to host Zoom calls you will want to create a free account. Here’s how to do that:
- In the Zoom app, click the Sign Up Free link
- Enter your email
- Check your email, and follow the link to finish the signup process on zoom.us
- Return to the Zoom app on your computer and sign in
Now that you are signed in to Zoom, it’s time to configure your settings.
Resonate’s Recommended Zoom Settings
The Zoom Client for Meetings app has decent default settings that will allow you to quickly join a call. But spending just a few minutes configuring the advanced settings will help you record a podcast with Zoom. Get started by clicking the gear icon ⚙️ in the top right corner of the Zoom app.
General Settings
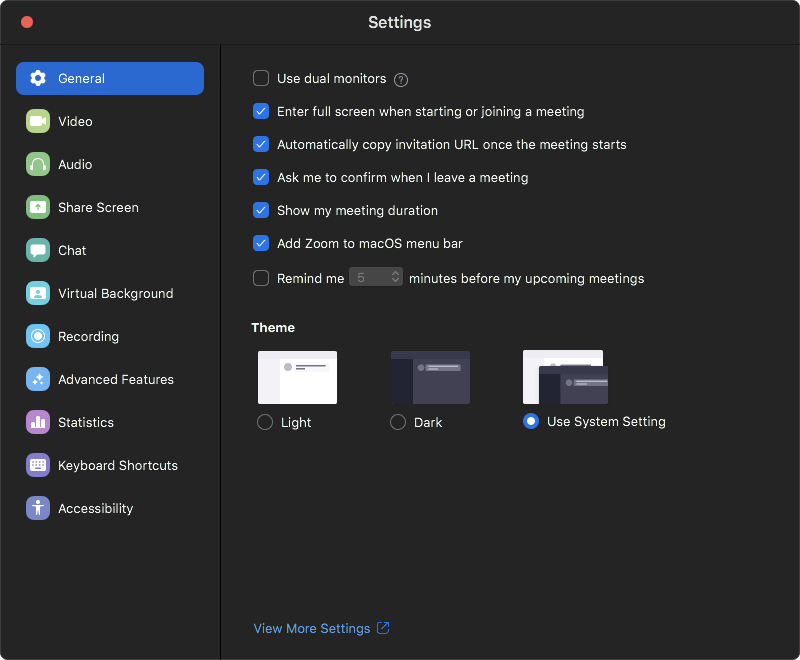
Under the General settings tab we recommend selecting everything except “Use dual monitors” unless you have multiple monitors. I won’t go through the settings one by one, but the option to have Zoom automatically put the invitation URL on your clipboard is really handy because it can be difficult to quickly find the invitation link as the host when you are trying to kick off the meeting.
Video Settings
Under the Video settings tab, the most important thing is to select your external USB webcam if you are using a laptop with a built-in webcam. Next enable HD and select the option to turn off your video when joining a meeting. It’s common to join a Zoom meeting where nobody has video enabled, and it’s a little awkward to pop-in with your camera on and then quickly shut it off after joining the meeting.
The video preview dialog option is like a little green room that allows you to check your video and camera settings before you turn on your video. This is an extra precautionary step that lets you join a call smoothly after fixing your hair and adjusting your lighting to look your best.
Audio Settings
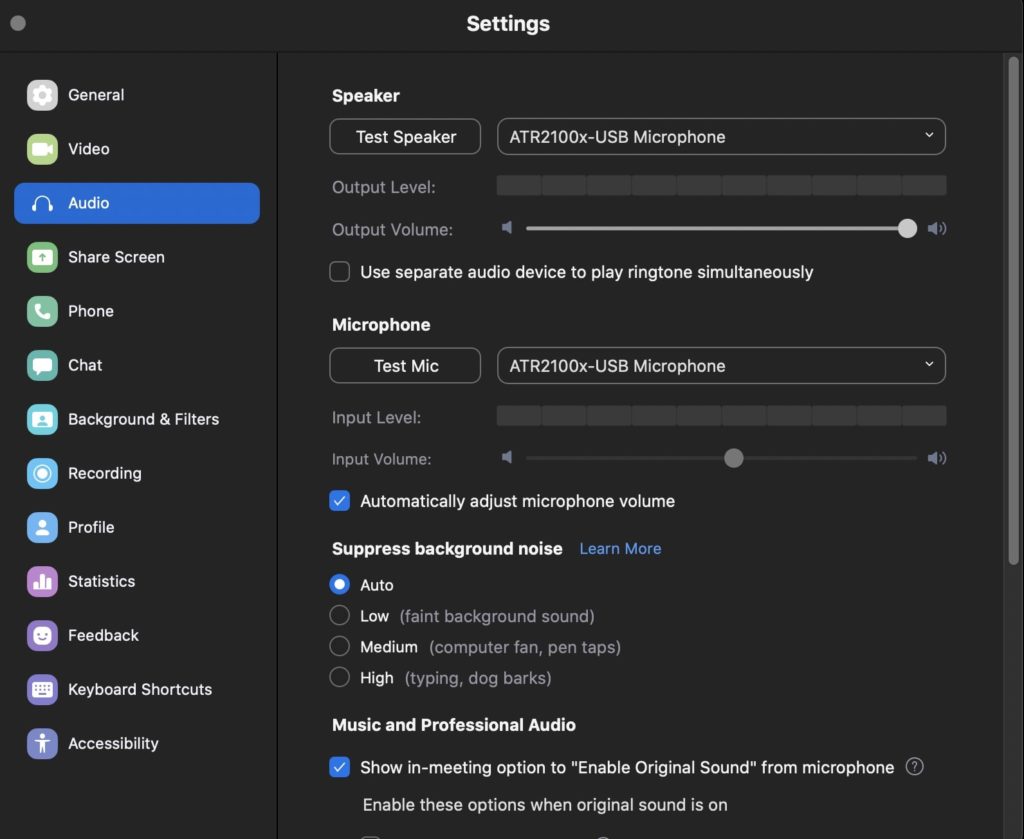
For podcasting with Zoom, the most important tabs are Audio and Recording. Verify that your microphone appears in the list of available mics, select it and then tap the Test Mic button to record some test audio and play it back.
Do the same for the Speaker setting: select your headphones and run a quick test by tapping Test Speaker. You should hear the Zoom ringtone in your headphones. We recommend that you enable the “Press and hold spacebar” unmute shortcut. Zoom calls work best when everyone except for the speaker is muted, but the participants can rapidly unmute without having to click around to find the mute button.
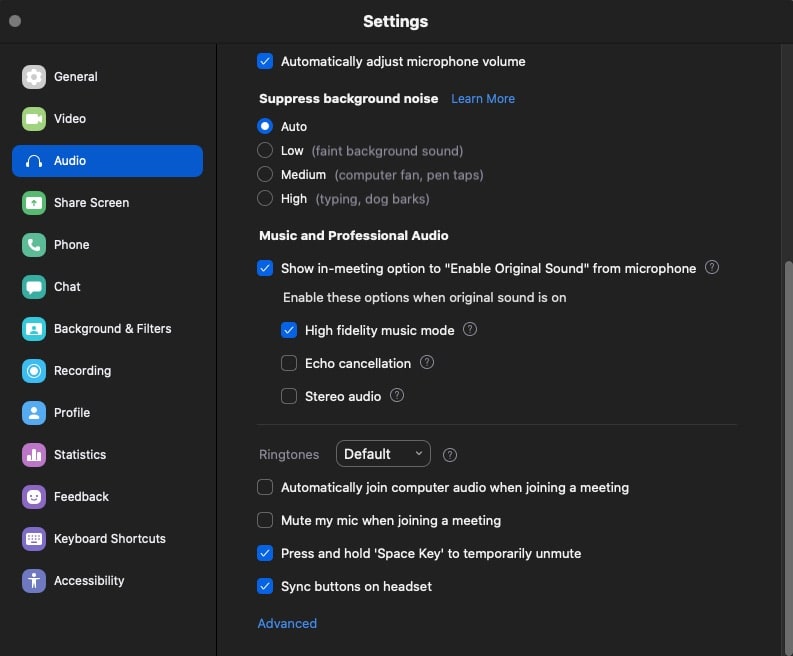
Further down the Audio tab, you will see an option to “Enable Original Sound” from the microphone. This is a setting you will want to test out. Some recordings need Zoom audio processing such as echo cancellation and background noise suppression. But if you are working with the Resonate Recordings team, it is better to have the original sound from your recording equipment and let us work our magic in post-processing.
You can also choose which tools to toggle on and off when original sound is active, such as “High fidelity Music Mode.” This feature will require more CPU, but will improve the quality of audio by disabling compression and Zoom’s post-processing, turning off echo cancellation, and raising the audio codec quality.
Once you select this option to enable original sound in a meeting, the final step is to click on “Turn On Original Sound” whenever you are in an active Zoom call.
![]()
Advanced Audio Settings
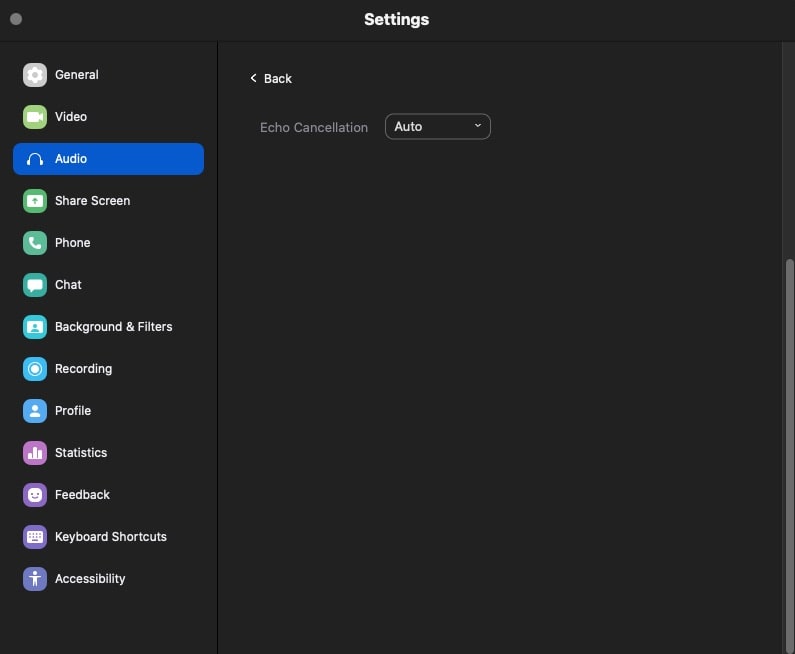
Under the Advanced Audio Settings, you can choose the intensity level of your Echo cancellation, if you choose to use that feature. The two echo-cancellation options are auto and aggressive. Again, in some cases echo-cancellation may be helpful, but we typically recommend turning this feature off in order to capture the most RAW audio for our team to edit in post-production.
Recording Settings
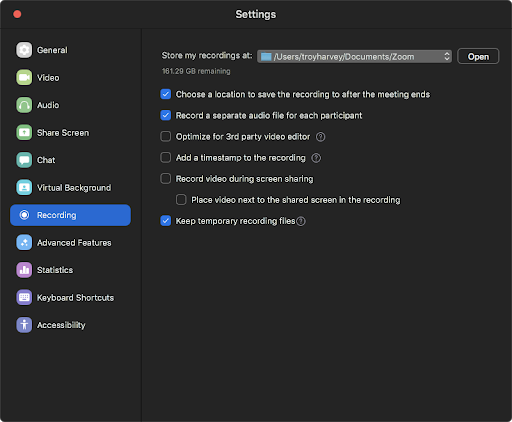
Recordings. The most critical setting in Zoom! Be sure to record a separate audio file for each participant. This will allow our team to mix your episode properly. You also want to allow Zoom to keep temporary recording files. If something happens to your computer during the call, this may help you recover the audio and not lose a valuable interview. I recommend having Zoom ask you where to save the recordings after the meeting ends so you don’t forget where the files are saved.
Disabling the video recording settings should free some resources for Zoom to focus processing power on your audio recording. Probably the most important thing on this screen is your disk space at the top. If you don’t have at least 16GB of space remaining, you should consider upgrading or freeing space on the computer before you start recording calls.
Cloud Recordings
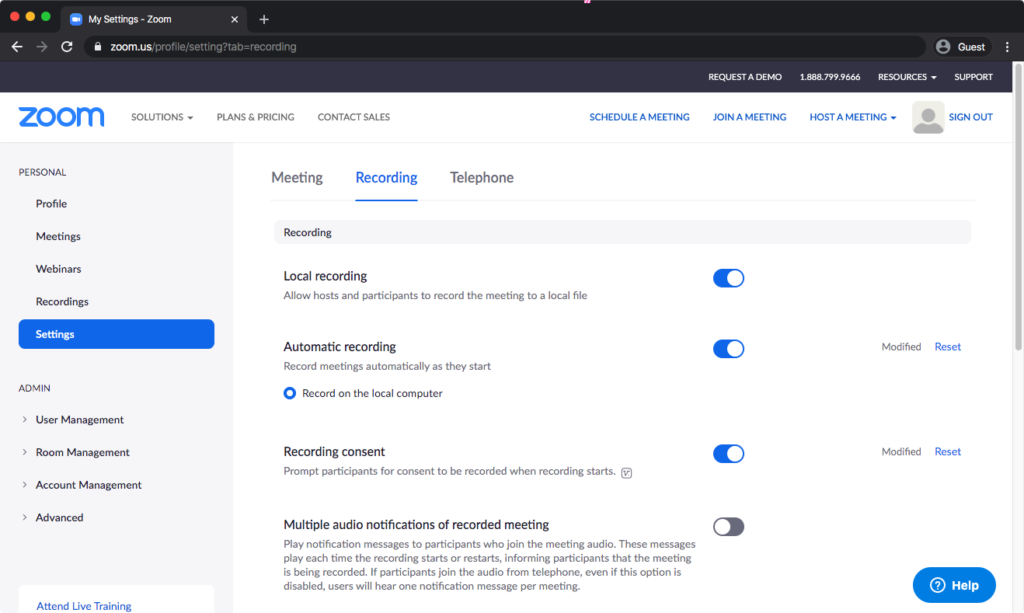
Zoom has some advanced Recording settings tucked away in the settings on zoom.us along with the settings for Zoom Cloud Recordings.
- Click the Advanced Features tab in the Zoom app
- Click the View Advanced Features button — this will take you to zoom.us Settings
- Recording tab
We recommend that you enable automatic recording and recording consent. This will ask your participants for their consent before recording the call. Be sure you understand the law before you disable the consent setting.
The Zoom Business plan ($19.99/month/host) offers up to 1GB of cloud recording, and we highly recommend this for backing up your recordings. If something happens to your local recordings, you can fall back to the files in the zoom cloud.
Now that Zoom is all setup and configured, you are ready to record your first call.
Recording a Zoom Call
Before you start recording a call, take a minute to review our recommended recording settings above in the section above, and then follow these steps to record your call:
- Start a new Zoom meeting
- Send the invite link or meeting ID to your guests
- Allow your participants to record the meeting
- Turn on Original Sound and ask your participants to do the same
- Start recording
- Ask all participants to start recording
- Record the interview
- End the meeting
- Wait for Zoom to save all recordings and ask your participants to do the same
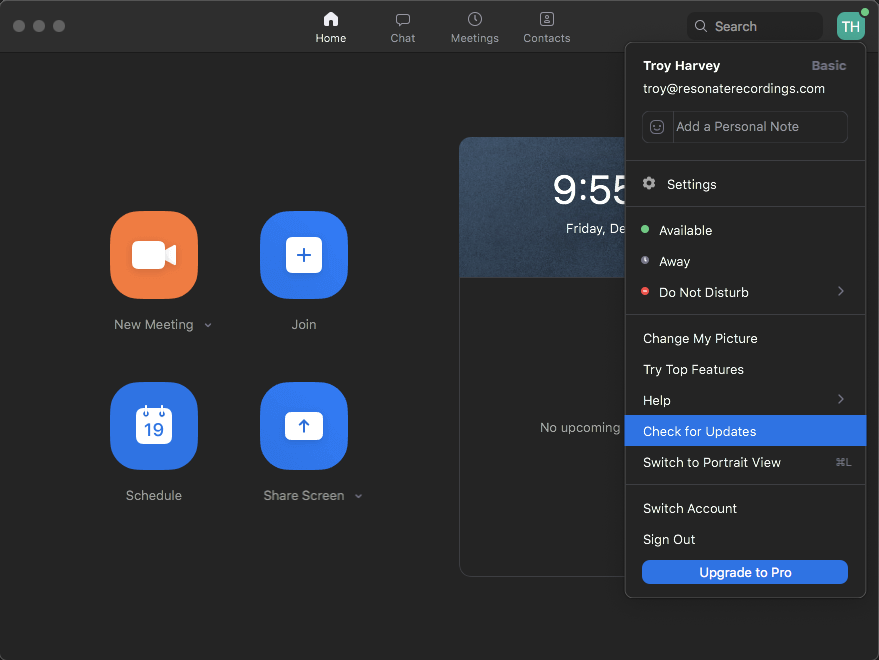
Before you start the call, be sure you are running the latest Zoom Meetings Client. Click your profile icon in the top right and then click “Check for Updates.” Ask all of your guests to do the same thing before you start the meeting. Zoom is constantly rolling out new updates, features, and bug fixes.
Click the “New Meeting” button to get started. This will launch the Zoom video chat, and you will see an overwhelming set of controls. So take a minute to just look around at the different controls. Where is the mute button? Where is the camera toggle? Open and close the chat panel. Knowing where the controls are in advance will make you a better host in the middle of your interview.

The first control you will need is the Invite button at the bottom. Tap “Invite” and then tap “Copy Invitation” to get the meeting ID and passcode. You can send this to your guest however you want — just paste it into an email or a message to them.

Once your guest has joined the Zoom call you will see the number of participants increase from 1 to 2 in the Manage Participants button at the bottom. Tap “Manage Participants” to see the full list of guests on your call.
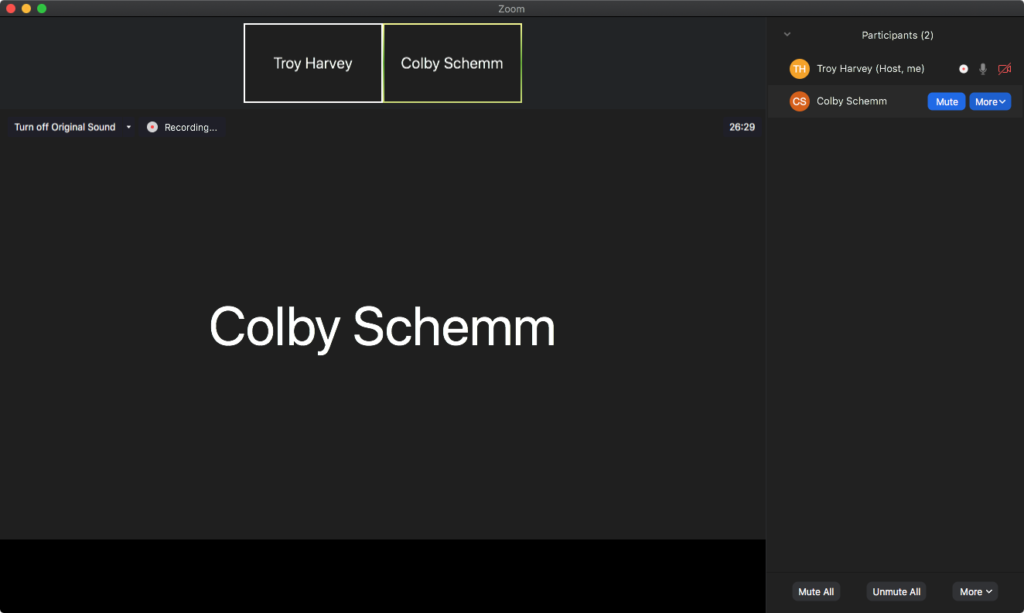
Grant your participants permission to record the call. To do that you hover over their name in the Participants listing. You will see a “More” button. Tap that and “Allow Recording.” After I did this, Colby was able to record our Zoom call locally. An option to Record appeared in his menu bar and all the recording controls are unlocked for him to begin recording.
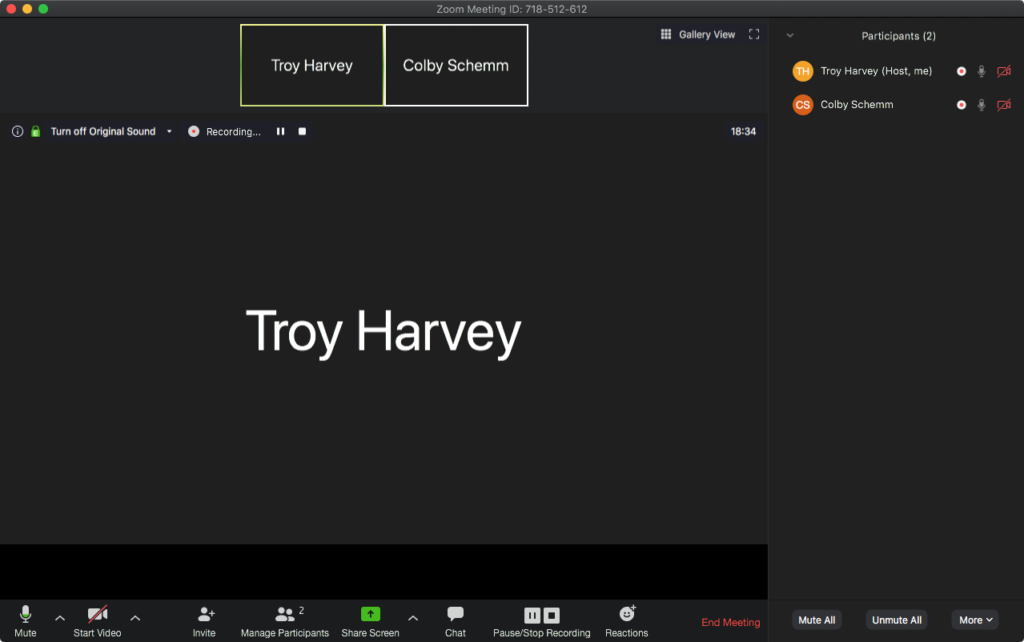
Everyone should start recording and “Turn on Original Sound” at this point. At this point you want to run through a quick checklist before you start the interview.
- Do we all see “Turn off Original Sound” in the top left?
- Are all of our microphones working?
- Is there a red recording bubble next to every participant?
Beautiful. You can finally get to the business of recording the interview. Once you are finished, ask everyone to leave some time at the end after the call to sort out the recordings. Zoom will take a few minutes to save all the audio files and then each participant should send their tracks to the host or the producer of your show. Give clear instructions for how to handle the recordings.
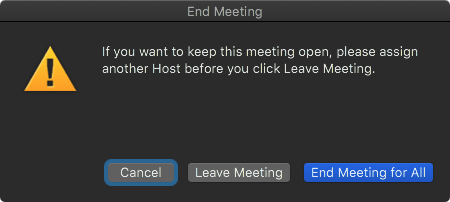
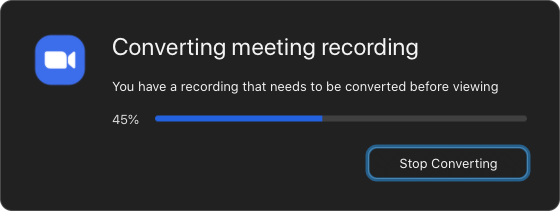
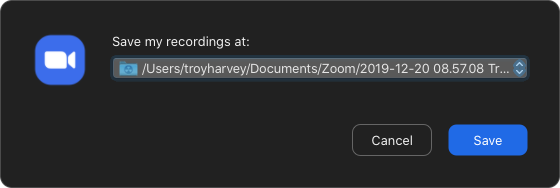
Now tap “End Meeting” and then “End Meeting for All”. After you end the meeting, Zoom goes to work converting your tracks and preparing to save the call. It’s important for you and your guests to stay put while this is happening so you don’t lose any recordings. Next Zoom will ask where you want to save the files and automatically open the folder with the files. If you can’t wait for the conversion, you can tap “Stop Converting” and do it later by opening the .zoom files in the recording folder.
Zoom Recordings
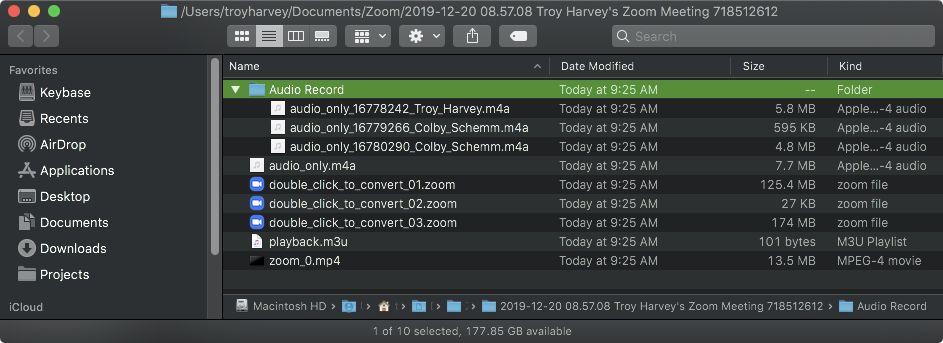
If Resonate is producing your show, we need an m4a audio track from you and each of your guests at a minimum. Each person should collect the file with their name from the Audio Record folder and submit it to us.
The .zoom files are the original Zoom native format used to convert to m4a files. You shouldn’t need these, but you should keep an archive of the entire session just in case you need to recover some audio in the future.
Should I Record My Podcast with Zoom?
Dear reader, if you landed on this post hoping for a simple answer to the question “should I record my podcast with Zoom?” I’m sorry to disappoint you but…It depends. Zoom has exploded in popularity, and you and your potential guests have likely used it already. So the convenience of recording with Zoom is an advantage.
I have been a remote worker for many years and used every imaginable video chat software. Zoom is hands-down the best video conferencing experience and now it is feature-packed.
However, audio quality is the primary concern when it comes to remote podcast interviews and you will need to decide if the audio you are getting out of Zoom sounds good enough for your listeners. The “Original Sound” feature in Zoom shows that they are listening to podcasters and constantly improving the system.
Next Steps
What should you take away from this? Here are my recommendations:
- Record a bonus episode or a short interview with Zoom to test it out
- Next time you schedule a phone call, use Zoom instead. Test it out on a low risk call
- Install the Zoom app on your phone so you can easily join calls when you are away from your desk
- Install the Zoom Scheduler Chrome Extension. This is my favorite feature — you can add Zoom calls to any Google Calendar meeting with one click
Zoom Alternative: Resonate’s Remote Recorder
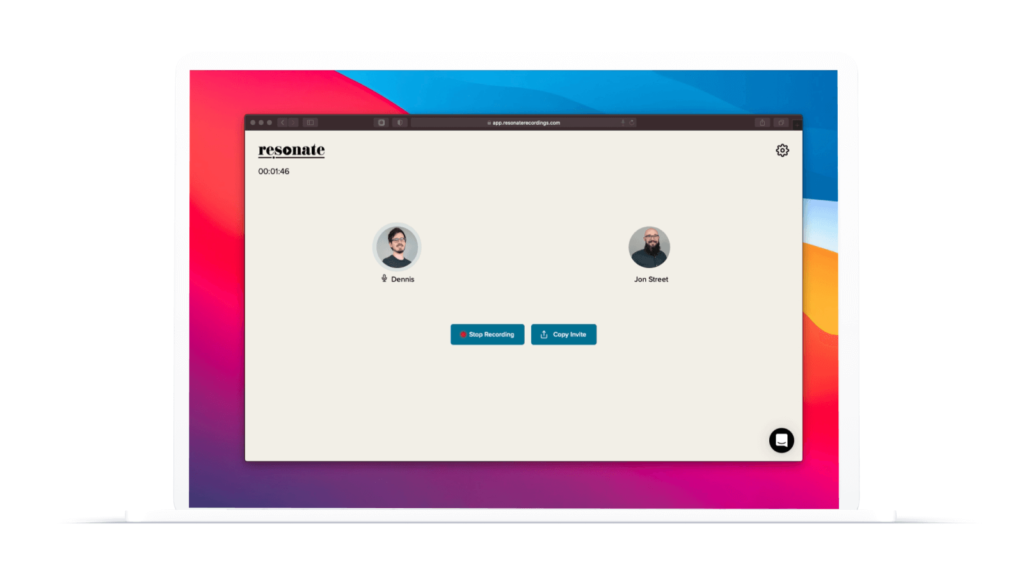
Zoom is an incredible tool for recording if you want simplicity and speed. We love using it internally for communication, and it’s even a great recording platform if you want something simple and fast. But Zoom is lacking in terms of the recording quality it offers. Recording local audio is a better solution because it gets rid of Zoom’s main issues: That lower quality recording sound, audio drift, and glitches from a poor internet connection.
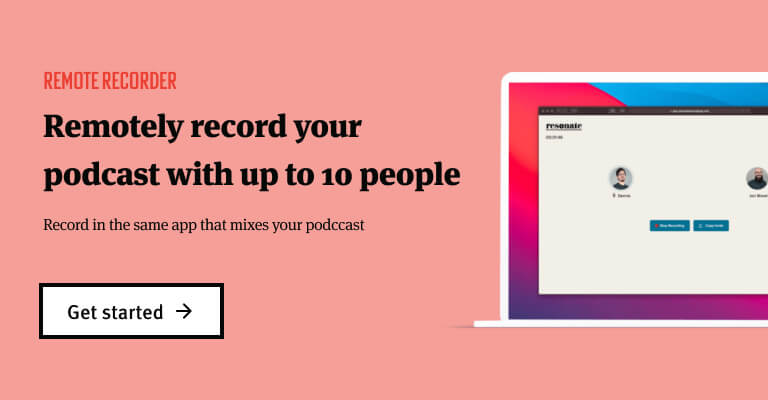
Our Remote Recorder offers crystal clear local recordings of you and your guests, no matter where you are in the world. Now you can record long-distance calls, professionally edit and mix your podcast, and host your podcast in one app.
Remote Recorder Features:
- Local recordings of all guests
- Unlimited recording time
- Record up to 10 participants simultaneously
- Progressive uploading
- Automatic cloud backups
- Privacy and security
- Live chat support
Get a 30-day free trial when you make any purchase at Resonate. Plus, clients who have purchased $5,000+ in the last year get a 1-year free trial.
See if you qualify for a free trial
Conclusion
In this post we covered the Zoom free tier that allows you to record unlimited 1 to 1 meetings. I walked through a checklist of the equipment that is required to record a remote podcast interview using Zoom. I covered how to install and configure the Zoom Meetings Client on your computer with all the settings we recommend, and how to record a Zoom call. If you have questions, give us a call at (888) 917-8793 or schedule a call with our team.
