As podcasting continues to gain popularity, it is becoming more clear that there is a real need to have simple resources available which help podcasters know how to create a podcast using easy, user-friendly methods.
A simple Google search will show that there are countless ways to record podcasts & it can become confusing figuring out which way is best. And while there are many ways to record a podcast, choosing the correct option will come down to the type of recording you are trying to do, the budget you have, the tools you have at your fingertips & what type of computer you are using. The advice we would give on recording a podcast will be different depending on your personal situation, but this resource is aimed at helping people who are considering looking at GarageBand as the solution for recording their podcast.
The Good…and The Bad of GarageBand
From the conversations we’ve had with many of our clients, we have seen that many people with Mac products will choose to utilize GarageBand to record their podcasts. Since GarageBand is a free program native on all Apple computers it is a very popular option for podcasters looking for a reliable way to record podcasts with minimal investment, simplicity & ease of use.
Like most of Apple’s hardware & software brainchildren, GarageBand is a well-designed application & is very user-friendly. But even the most simplistic tools can be used improperly if there is not a little bit of coaching given. Since GarageBand was primarily designed as a resource for creating & recording music there are a lot of built-in features that are not intended for recording a podcast, so this video is designed to help podcasters know how to create a podcast using GarageBand most effectively. Because there is so much confusion, we want to offer something comprehensive that will walk you through the step-by-step process of how to recording in GarageBand while not compromising quality or creating a distracting effect on the final track.
It will walk you through how to start a new session, record your podcast, do simple podcast editing & export your files. It is intended to help podcasters like you know the best way to optimize GarageBand for podcasting & avoid some of the most common mistakes & hiccups we help our clients navigate on a regular basis. It is not uncommon for our team to encounter a lot of issues. Below is an overview of the topics covered in this helpful tutorial with corresponding timestamps for ease of use to help you better review the specific steps on how to create a podcast using GarageBand:

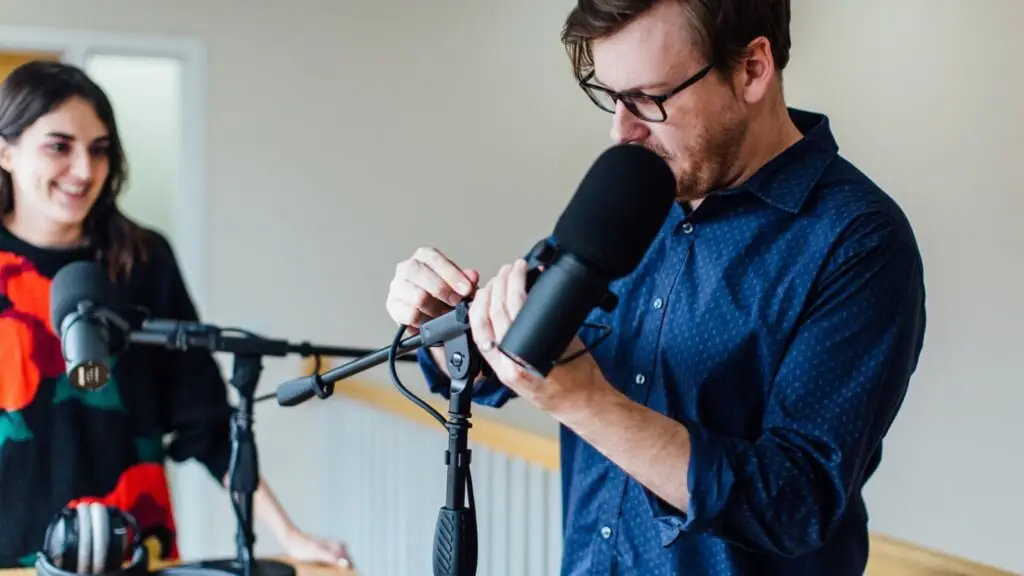
How to Set Up Your Microphone on GarageBand
Setting up your mic to record a podcast in Garageband is a simple process, but it’s crucial that you follow the right steps to ensure you don’t put distracting effects on your vocals that will lower the audio quality and distract your listeners.
1. Create a new “Empty Project”
*Don’t fall for the temptation to choose “Voice.” This will add unwanted fx to your voice that will mess up your audio quality. Instead, just create from an Empty Project.

2. Select Input and Output Devices
Choose your microphone input and output device. We recommend using the headphones output on the AT2005 USB mic to monitor yourself recording with low latency.

3. Choose a Track Type
Pick “Audio” using a line input (this should be selected by default) and choose Input. After you press “Create” your new track will be added into your Garageband session.

How to Save and Archive a Session
It’s critical that you save your podcast in a clearly marked folder, and consistently save your podcast throughout the recording and editing process so that you don’t lose precious files. Here’s how to properly save and archive your Garageband sessions.
1. Navigate to File > Save As

2. Create a New Folder for Your Podcast
Once you open ‘Save As’ in GarageBand, you will see that the filed are stored within a default folder of your computer. We recommend that you create a subfolder for each podcast you work on, with subfolders for seasons and then individual sessions within those seasons.

Pro Tip: You can save a copy of your GarageBand session, label it “Podcast Template,” and then create a duplicate of that session every new episode to avoid the tedious work of deleting old content, naming all of your hosts tracks, and saving the session in the proper folder.
How to Set Up Your Microphone on GarageBand
One of the most common mistakes we see people make when podcasting on GarageBand is leaving the vocal effects on a channel (such as reverb and echo). These can create major headaches in mixing later on, and are often very difficult to remove. So we recommend setting yourself up for success by recording with the effects off for a clean, dry signal of your audio.
1. Navigate to the “Master” section and turn off all plugins

2. Turn off the Master “Echo” Effect

3. Double-check your channel to ensure all FX are turned off

4. Create new tracks (eg intro VO, outro VO, interview, etc) and repeat the process
How to Record Tracks
1. Turn on monitoring for your track

2. Set your recording level
The recording level is not set in the main settings for your track. Instead, it is buried in the settings below for each individual track, next to the compressor/echo/eq effects that we turned off in an earlier step above. When you set the recording level you are affecting the actual volume of the microphone input. When you adjust the volume bar within the track title section you are adjusting the recording’s playback volume within the session.

3. Hit Record
Select the track you want to record (eg Intro VO or Outro VO) and once that specific track is highlighted, GarageBand will know to write the recording to that specific track.

How to Edit Tracks
1. Click and Drag Clips to Organize Your Session

2. Open the Track-Specific Edit Window for a Closer View

3. Hit CMD+T to “Split at Playhead” and Delete Unwanted Content
How to Add Music
1. Open Finder and click-and-drag music files onto the GarageBand timeline

2. Turn down the track volume to let your voiceover stand out

3. Trim the length of your music

The next step after trimming your music will be to automate a fade out to the volume of your music to make a smooth transition between your podcast intro and the main content of your episode.
How to Automate The Volume of a Track
1. Hit CMD+A to Open the volume automation layer of each track

2. Click within the track to make the automation line visible, and add a fade out on your intro music

How to Export A Mix of All Tracks
1. Go to Share > Export Song to Disk

2. Create a new “Exports” folder for your episodes

3. Choose proper export settings
Export a WAV file at the highest quality (bit rate) that your mic supports. Once you click export, a mixdown of your rough mix will be exported to your new custom folder in the Garageband session folder.

How to Consolidate and Export Individual Files
1. Record 1-2 seconds of empty space at the beginning of each track

2. Click Edit > Join Regions
This will merge together the new blank recording at the beginning of the timeline with the audio later in the timeline. Remember, the goal is to match the starting postion of each individual audio file for exporting so that your podcast editor can easily align the beginning of the track.

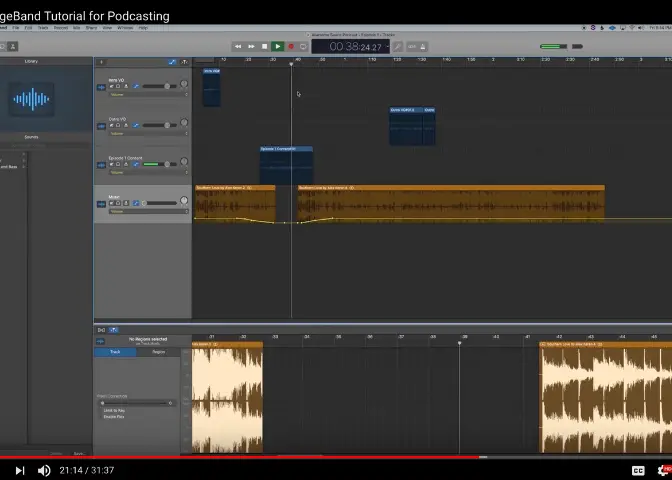
3. Repeat the steps to merge all the audio clips on each track
The screenshot below shows you how your merged tracks will look in a session when you are done. This is a much cleaner setup for exporting for your editor, or just for streamlining your GarageBand session in general.

4. Rename your audio files (optional)
5. Quit Garageband program > Open a Finder window > Locate your Garageband project > Right click to “Show Package Contents” > Media > Audio Files > Look for all files labeled “merged”

6. Import your merged files into your mixing session
When you import these newly merged files into your DAW of choice for final editing and mixing, all of your individual tracks should align at the same starting point.
GarageBand Keyboard Shortcuts
If you want to speed up the recording, organizing, and editing process for podcast production then the best thing you can do is to study your software. Garageband is a simple tool, but that doesn’t mean it’s weak. It’s a powerful tool if you take the time to learn the shortcuts, and learn how to use it. Sometimes it’s not the tool that’s inhibiting you but your knowledge or experience. Don’t be afraid to make mistakes and just try to press all the buttons until you learn everything.
One great way to learn this program is to turn on the Quick Help Tooltips that give you an explanation of each button/section of Garageband when you hover your mouse over them (hint: that’s why it’s the first shortcut in our list). Try using all these top shortcuts in Garageband for yourself, and learn more about the program on Garageband Support.
- Shift+? – Quick Help Tooltips
- A – Open volume automation
- R – Record
- E – Open Editors Window
- B – Open Smart Controls
- CMD+T – Split track at playhead
- CMD+ J – Join Regions (aka merge audio clips)
- Opt+CMD+N – Create a new track
- CMD+C – Copy
- CMD+V – Paste
- CMD+X – Cut
Let’s Connect
We hope this tutorial has been helpful in giving you the overview you need to be able to effectively use GarageBand for podcasting. We realize we could not cover all of your questions during this short video but our team is always available to help you troubleshoot any other issues you may face. For any additional questions not covered by this tutorial or to learn more about our support processes please email the Resonate Recordings team at hello@resonaterecordings.com or chat with our team on this page. You can also schedule a call to learn more about our services today!